


آموزش تنظیم تکسچر صورت برای مدل سازی Game
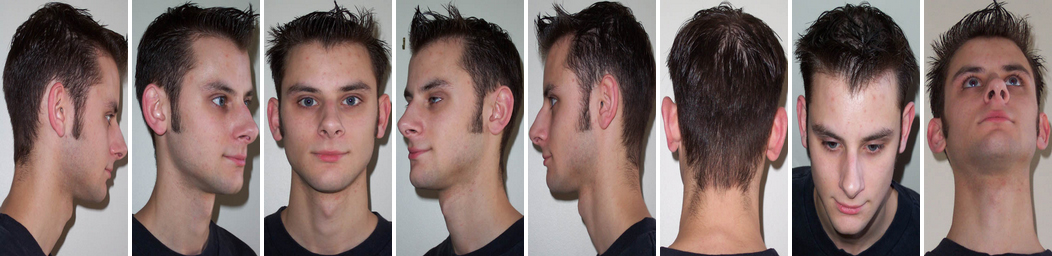
Source data
We start with a couple of facial pics, our model is fellow WorldForger, Simon. The series shown here are excellent sources of face textures: well lit, high resolution, all angles (even +- 45 deg vertical).
What do we need?
In theory it is possible to make textures with only front, one side, and rear pictures, but having more makes it much easier to make a smooth texture.
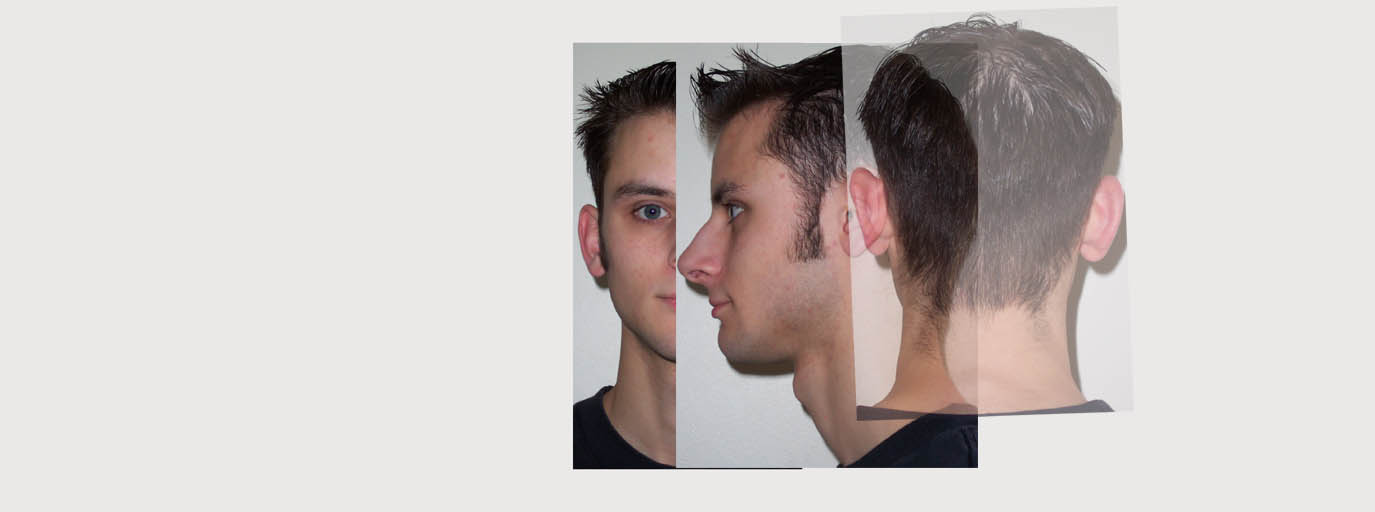
Combining pictures
We start with the frontal picture. To make room for the rest of the texture we resize the canvas. I like to be sure there’s enough room, so I resize it horizontally by 600% and vertically by 120%.
I then paste onto it one of the +- 45 degree views (skip this if it’s not available). I choose to start with his left side.
Next step is to set the transparency of this new layer to approximately 60%. This way I can see the layer underneath. I then scale the layer, moving the corner until the next layer’s inner eye-corner overlaps the layer underneath and the rest of the facial features (like cheek and hairlines) are of the same scale as the layer underneath.
The positioning of the pictures is a very important step in the creation of the texture — take care to make things overlap. The 45 degree layer is there to smooth things out. It is, however, not completely necessary and for now it is turned off. Repeat the exercise with the left-view, only this time use the outer corner of the eye to determine the horizontal position.
I then turn the left-side layer transparency to 100% and add the rear-image. Here I use the lower hairline, combined with the size of the ear, as the initial positioning guide. Before scaling, I use a rotation-tool to straighten the image a bit.
I turn off the layers and repeat the process for the right side of the face. For the rear image I duplicate the left side rear image to preserve rotation and scale.
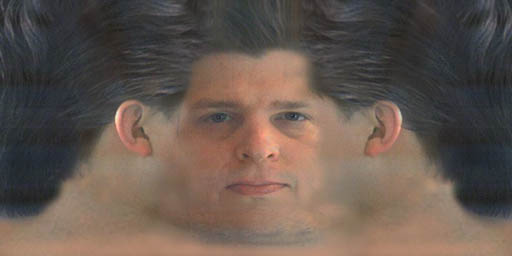
Now this is a great picture, isn’t it?! Just about ready to be plastered onto a mesh. I turn off all layers, except the 45 degree left, which I turn to 0% transparency. Next, I choose the eraser tool and using a smooth brush with 50% opacity I start erasing the 45 degree layer. I erase from the left side and remove the layer where it seems fit. The brush settings make sure the transition between layers is smooth. The Undo command is used whenever too much layer is removed. Every now and then change the layer transparency to see what must still be removed.
I love that eraser tool! In a very short time a smooth transition between the layers has been created. I make sure eye, nose and lips are all from front-picture. I repeat process with the other layers.
'
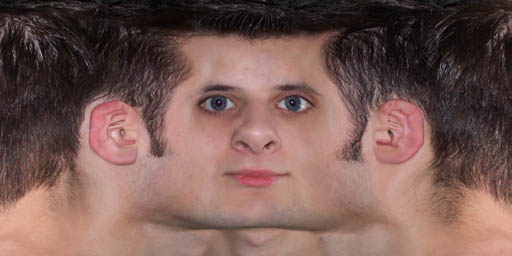
Ok, that’s a start, and there are a couple of details left. The hair on the top of the forehead can be extended a bit and the skin under his cheek must be smoothed a bit. This is traditional photo-retouching work and will not be described here. Furthermore, the color/contrast settings of the different layers must be adjusted to optimize layer blending. The finished picture is cropped and scaled to a dimension that is twice as wide as it is high, i.e. 2^n (h) by 2^n-1 (w). For example, 512×256 pixels, or 1024×512 pixels, or 2048×1024 pixels. In-game textures should probably be around 512×256 pixels, but original media should preferably be of higher resolution, 1024×512 being a nice round number. The resulting texture looks like this:
This is, in principle, a finished texture and it can be used directly on a model. However, compare it to this texture:
This is a texture made earlier, based on much lower resolution pictures of Pato. It is currently in use on the male-builder model for Mason. Closer inspection of the two textures reveals that facial features like eyes, mouth and ears are positioned differently in the two textures. This implies that if a model had been equipped with one texture, swapping the textures would result in the texture being misaligned with the mesh. The only solution is to make sure all textures have all facial features at the same place. For this reason, the “WorldForge Standard Head Texture Template” [TM] © {Reg) (Pat. Pending.) is being developed. Below is an early version of the WFSHTT is displayed. The current version is available at http://purple.worldforge.org/zzorn/textures/template/humanoid/.
The details behind the design of the WFSHTT are beyond the scope of this document.
Anyway, using a combination of a warp-program and manual retouching, the texture is warped to fit the template.
Ok, I know it, he’s not a beauty.However, with some time to improve template and program, the warped textures should become better.
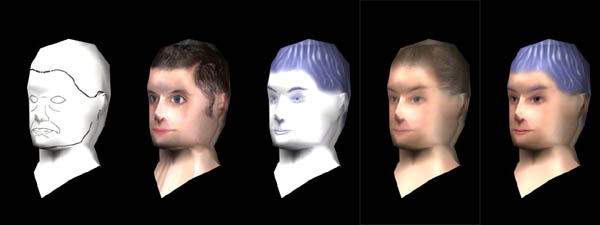
To show the potential of template style textures, here we have 5 different textures applied to the same mesh. It is a fast and sloppy job, but it shows the potential. Combine 3-4 meshes with 5-6 textures and you get a large crowd of different individuals.
This tutorial is brought to you by WorldForge – the original open source MMO project http://www.worldforge.org/
You can find pre-made, ready to use, head textures at 3d.sk website.


 پاسخ با نقل قول