Fire up any version of Maya regardless, I found a reference image of sword while searching Google so i would like to share it with you if you want to follow along with me or you can check other various weapon references here.
Download the reference image from here
1 – its time to set our reference image, go to your top view port View>>Image Plane>>Import Image, find out your reference image and hit ok, as you can see in the image below.
PS: Make sure you did this in top view port.
2 – now our image is set as a reference image, like in the image below.
3 – in the top view port create a cube with the same subdivisions as in the image below.
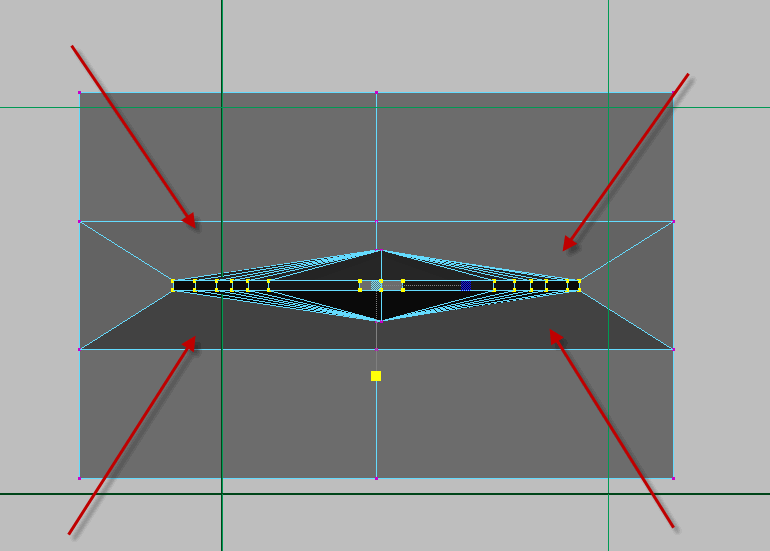
4 – now select the 2 middle faces use your extrude operation without any extrusion and then use your scale tool to match the blade in the reference image, once you done with it, use your move tool to bring those faces a little bit like forward as in the image below.
5 – with the same face still selected use extrude and keep moving along the edge of the blade like in the reference image below.
6 – keep going.
7 – still keep moving and use your scale tool to match along the blade with reference image.
8 – we are almost done.
9 – extrude and use your scale tool to match along the tip of the reference image.
10 – ok we are done with the blade for now, select the border vertices leave the middles vertices, but only select the whole vertices in the tip of the blade as you can see in the image below.
Posted by Tomas P in Featured, Modeling | 1 comment
11 – go to your front view port and use your scale tool to move the selected vertices, as in the image illustrating below.
12 – by now you should have something like this.
13 – ok now its time to create the carve in the middle of the blade as we can see in the real word swords, to do so follow the image below.
14 – with the "Offset Edge Loop Tool" selected click and drag over the middle edge this will create a extra lines for us which will help us to create the carve, once you created the lines, now select the both sides middle edges of the blade and then use your scale tool to move them down, see in the image.
15 – its time to move on to handle, select the outer vertices of the handle and move them outside to have a round shape, use your scale tool to move them symmetrically.
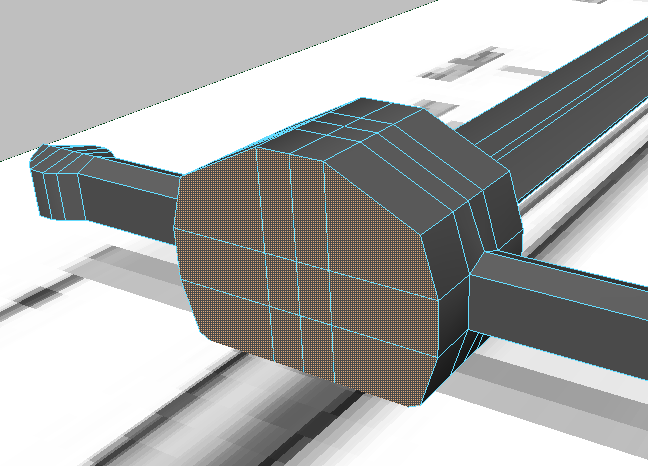
16 – go to face mode and select both sides faces, this should be single faces from both sides to create that little hand protector, and then use your extrude tool to extrude.
17 – keep extruding and create the round shape in the end, use your scale tool to make it round.
18 – we will use this tool to create edge loop around the middle of the handle.
19 – now if you click on the middle edges it will appear as a red dot with red lines its indicating that the edges are being created, so keep creating until you finish from where you started.
20 – select the vertices of newly created edge and move them up using scale tool.
21 – with that done, its time to finish the handle, select the entire faces, as in the image below.
22 – and hit delete, select the outer edges we will fill it with polygon face.

23 – still with edges selected go to Mesh>>Fill Hole.
24 – and now its filled with polygon face.
25 – select the face extrude it and then use scale and move tool to create a shape like in the image below.
26 – in the top view port extrude the handle and follow along the reference image.
27 – keep extruding and use your scale and move tools to create the shape.
28 – by now you should have something like this image below.
29 – smoothed version.
Here we are done with modeling, now go ahead and start the texturing for your model, here is mine a pretty basic texturing, used "Automatic Mapping" and then used, cut, sew tools inside the UV texture editor to attach the parts together, texturing is allot more time consuming so take your time and have fun.
forgive my dirty work guys, painted the textures in photoshop, not so clean, it could be allot more better but to be honest i am too lazy to do.

These are my final images:
- with specular map:
- without specular map:
ممنون از دوستان


 پاسخ با نقل قول
